
Need Additional Help? If you need further assistance after reading this article, please contact the IT helpdesk via email at techsupport@baypath.edu or by phone at (413)565-1487.
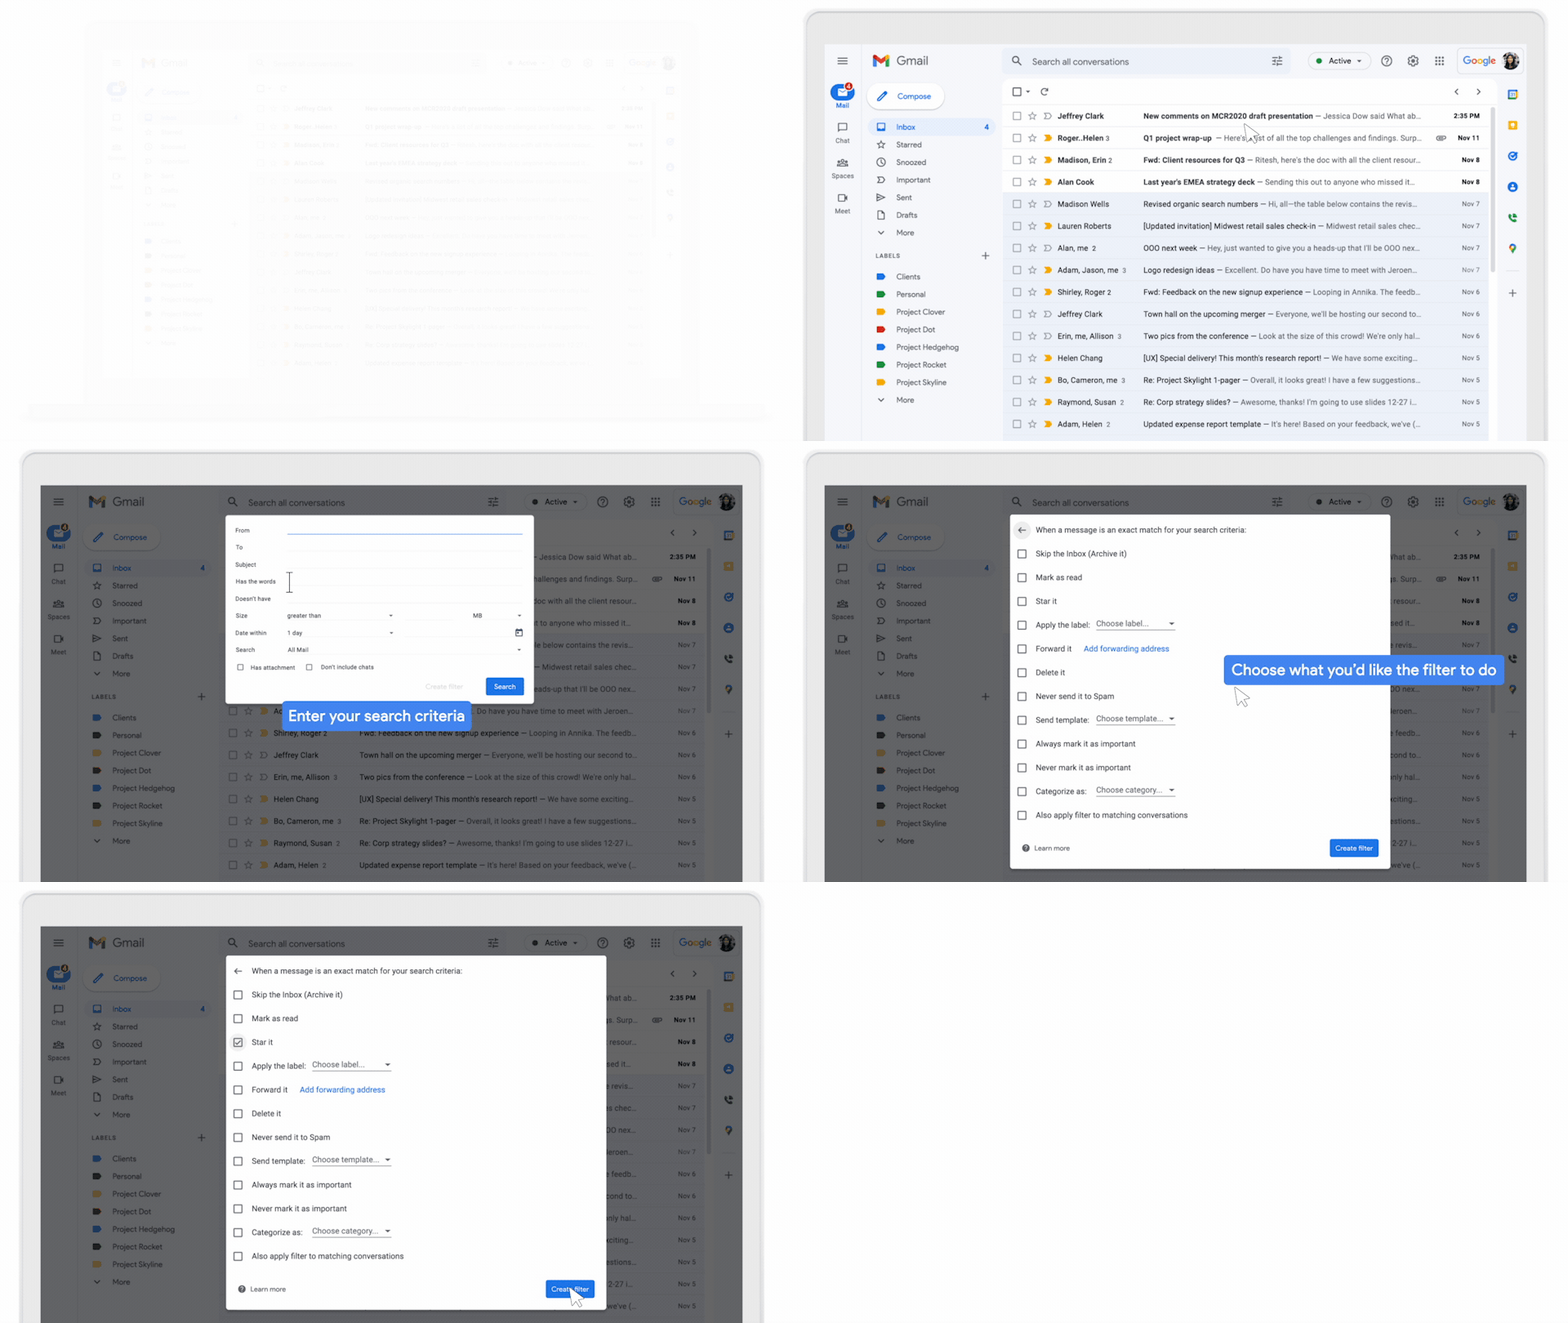
On your computer, you can manage your incoming mail using Gmail’s filters to send email to a label, or archive, delete, star, or automatically forward your mail.
Create a filter
-
Open Gmail.
-
In the search box at the top, click Show search options.
-
Enter your search criteria. If you want to check that your search worked correctly, see what emails show up by clicking Search.
-
At the bottom of the search window, click Create filter.
-
Choose what you’d like the filter to do.
-
Click Create filter.
Use a particular message to create a filter
-
Open Gmail.
-
Check the checkbox next to the email you want.
-
Click More.
-
Click Filter messages like these.
-
Enter your filter criteria.
-
Click Create filter.
Edit or delete filters
-
Open Gmail.
-
At the top right, click Settings and then See all settings.
-
Click Filters and Blocked Addresses.
-
Find the filter you'd like to change.
-
Click Edit or Delete to remove the filter. If you’re editing the filter, click Continue when you’re done editing.
-
Click Update filter or OK.