
Using Workspace Reservation in the Zoom Desktop App
Need Additional Help? If you need further assistance after reading this article, please contact the IT helpdesk via email at techsupport@baypath.edu or by phone at (413)565-1487.
Workspace Reservations allows individuals users to reserve workspaces in the office. This article will walk an individual through the steps to manage a Workspace Reservation through the Zoom desktop application.
Reserving a workspace
1. Open the Zoom app on your device. Click the Workspaces button on the top row.
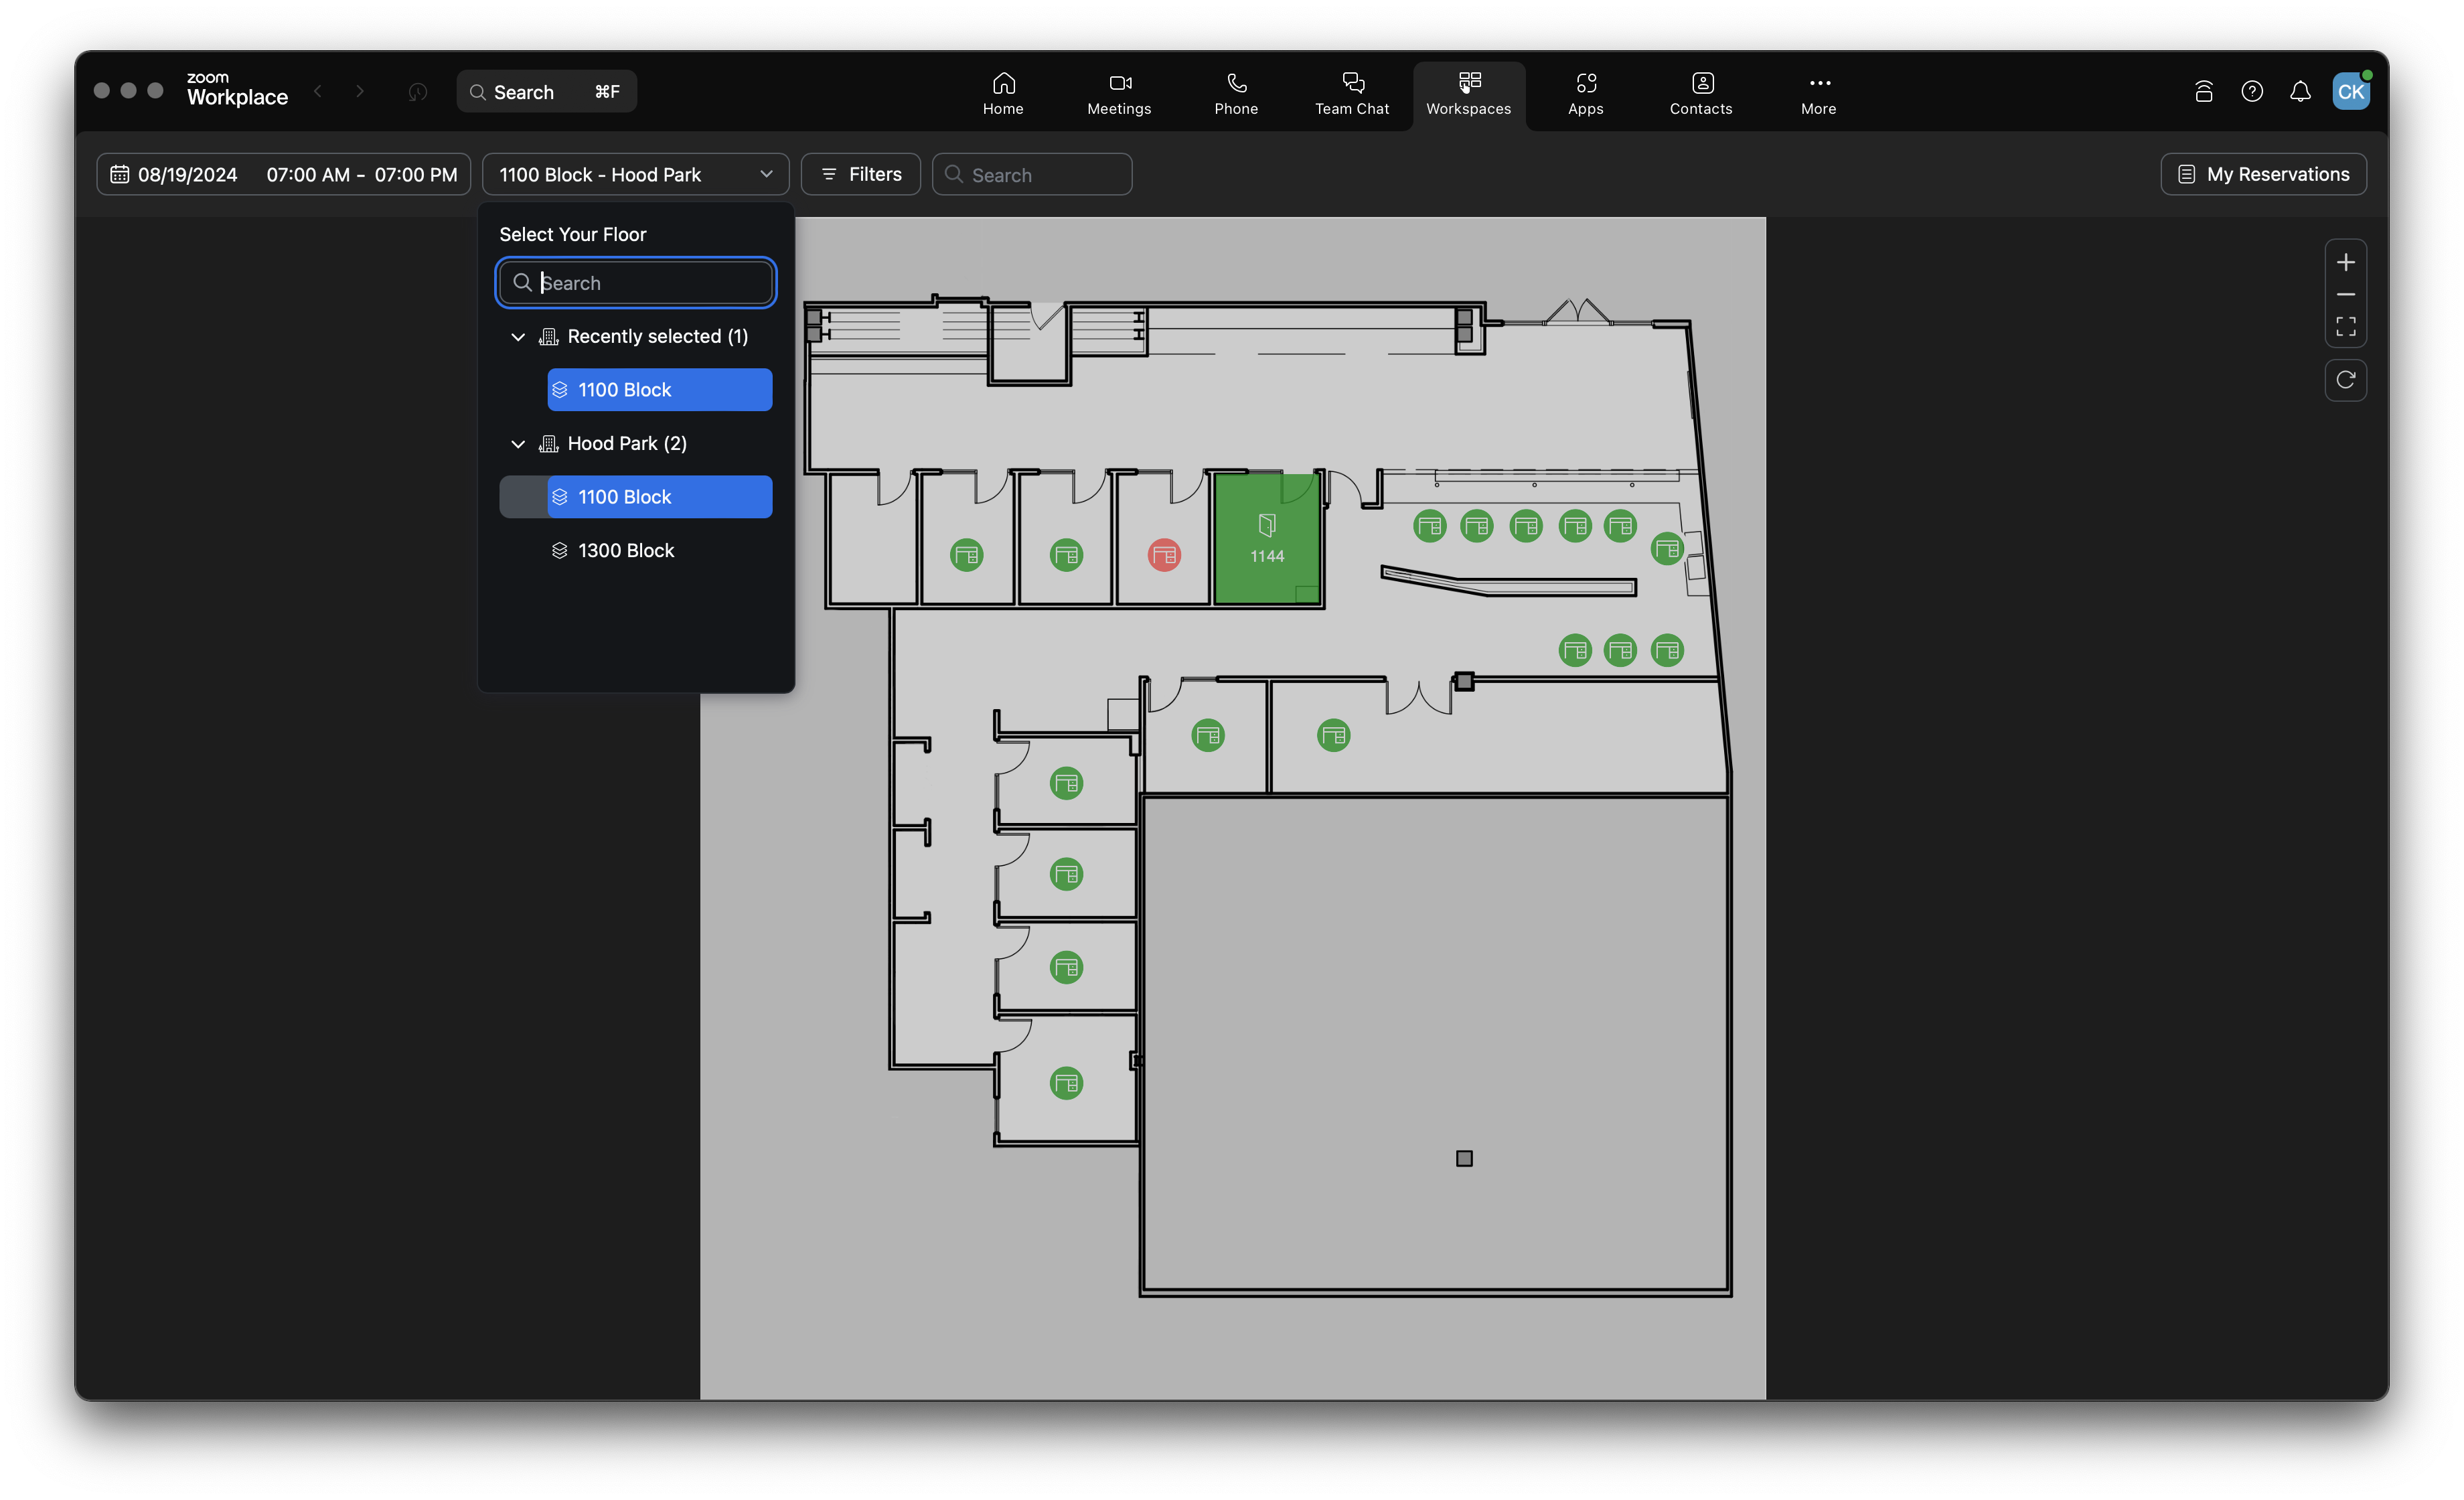
At the time of writing this article, there are two different floor maps configured in Workspace Reservation, the 1100 block of office and desk spaces, and the 1300 block of classroom and conference spaces. For the purposes of this article, we’ll select the 1100 Block. Additionally, select the date and time frame that you’d like to reserve a space for.
To help ensure that rooms become available, the maximum amount of time that can currently be reserved in a workspace is 8 hours or 2 hours for a conference room or classroom space.
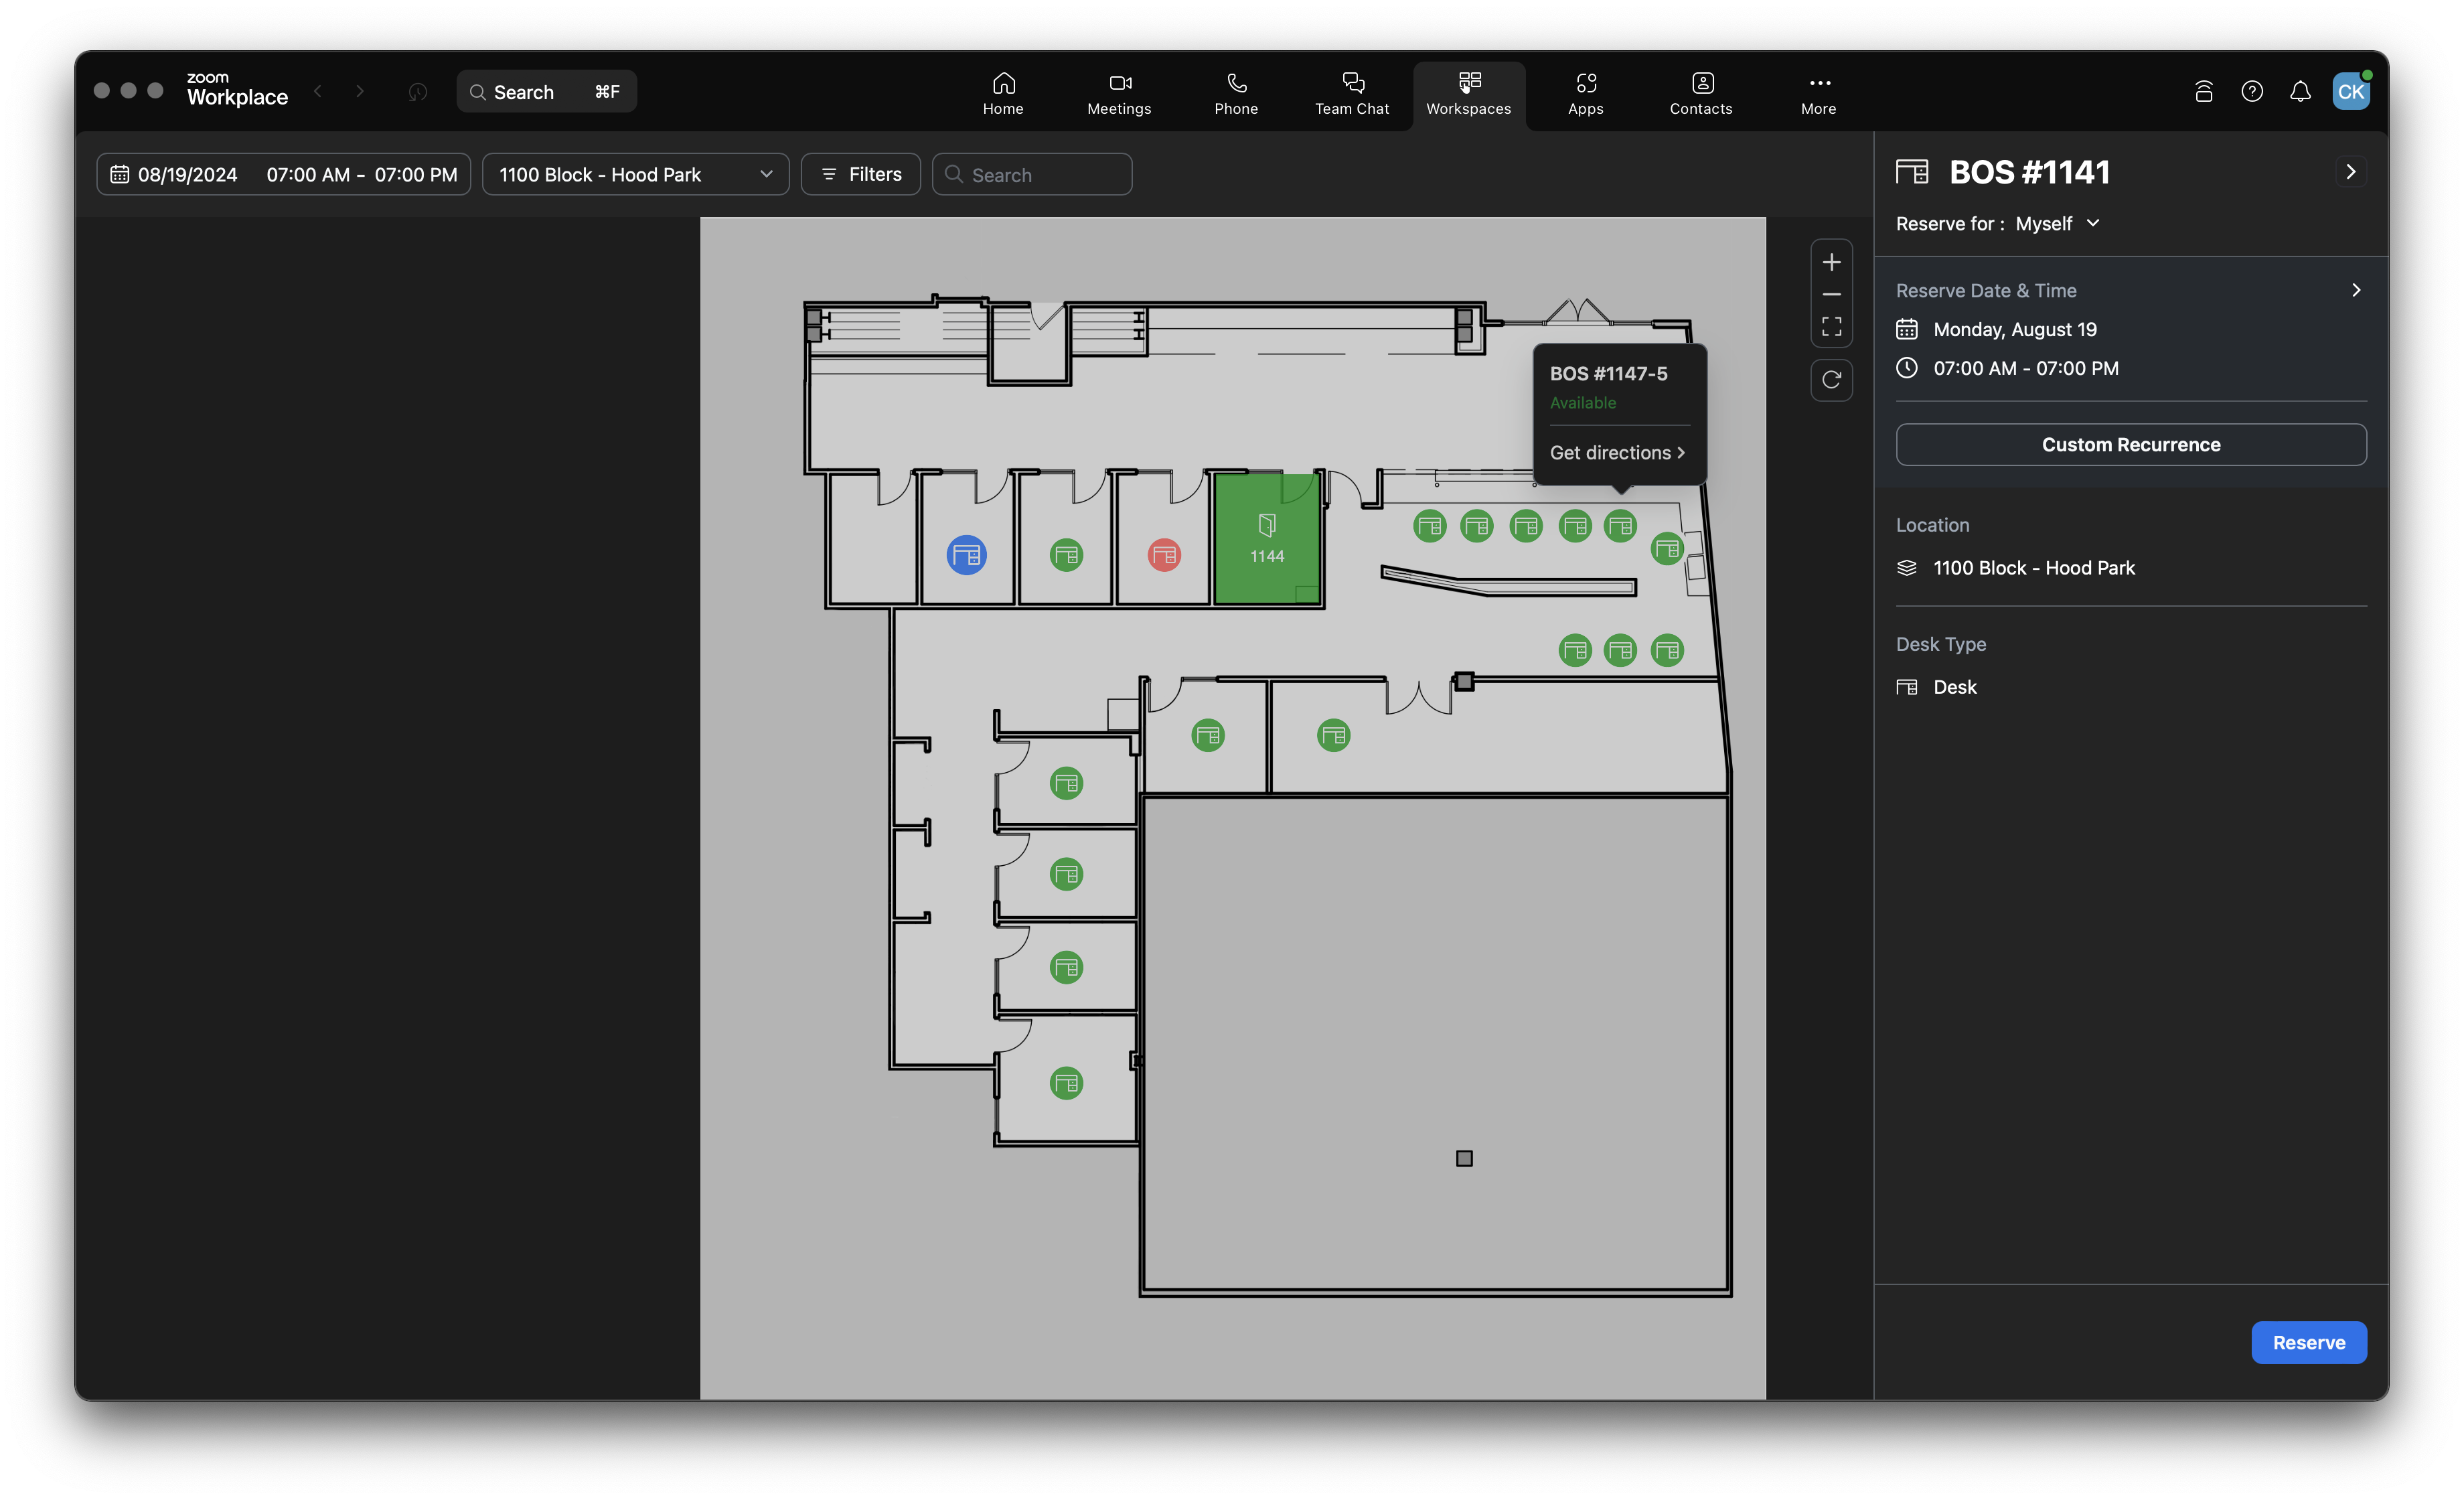
Once you’ve selected the 1100 Block, click on the workspace that you’d like to reserve. Available workspaces will be in green. Workspaces that have an existing reservation will be in red. From this screen you can customize your reservation. If you you’d like to reserve this room for multiple days, you can click Custom Recurrence to set a recurring reservation on a daily, weekday, or weekly basis. If you’d like to reserve a workspace for a single day, click Reserve.
Once you have clicked Reserve, you will see that your reservation is confirmed on this screen.
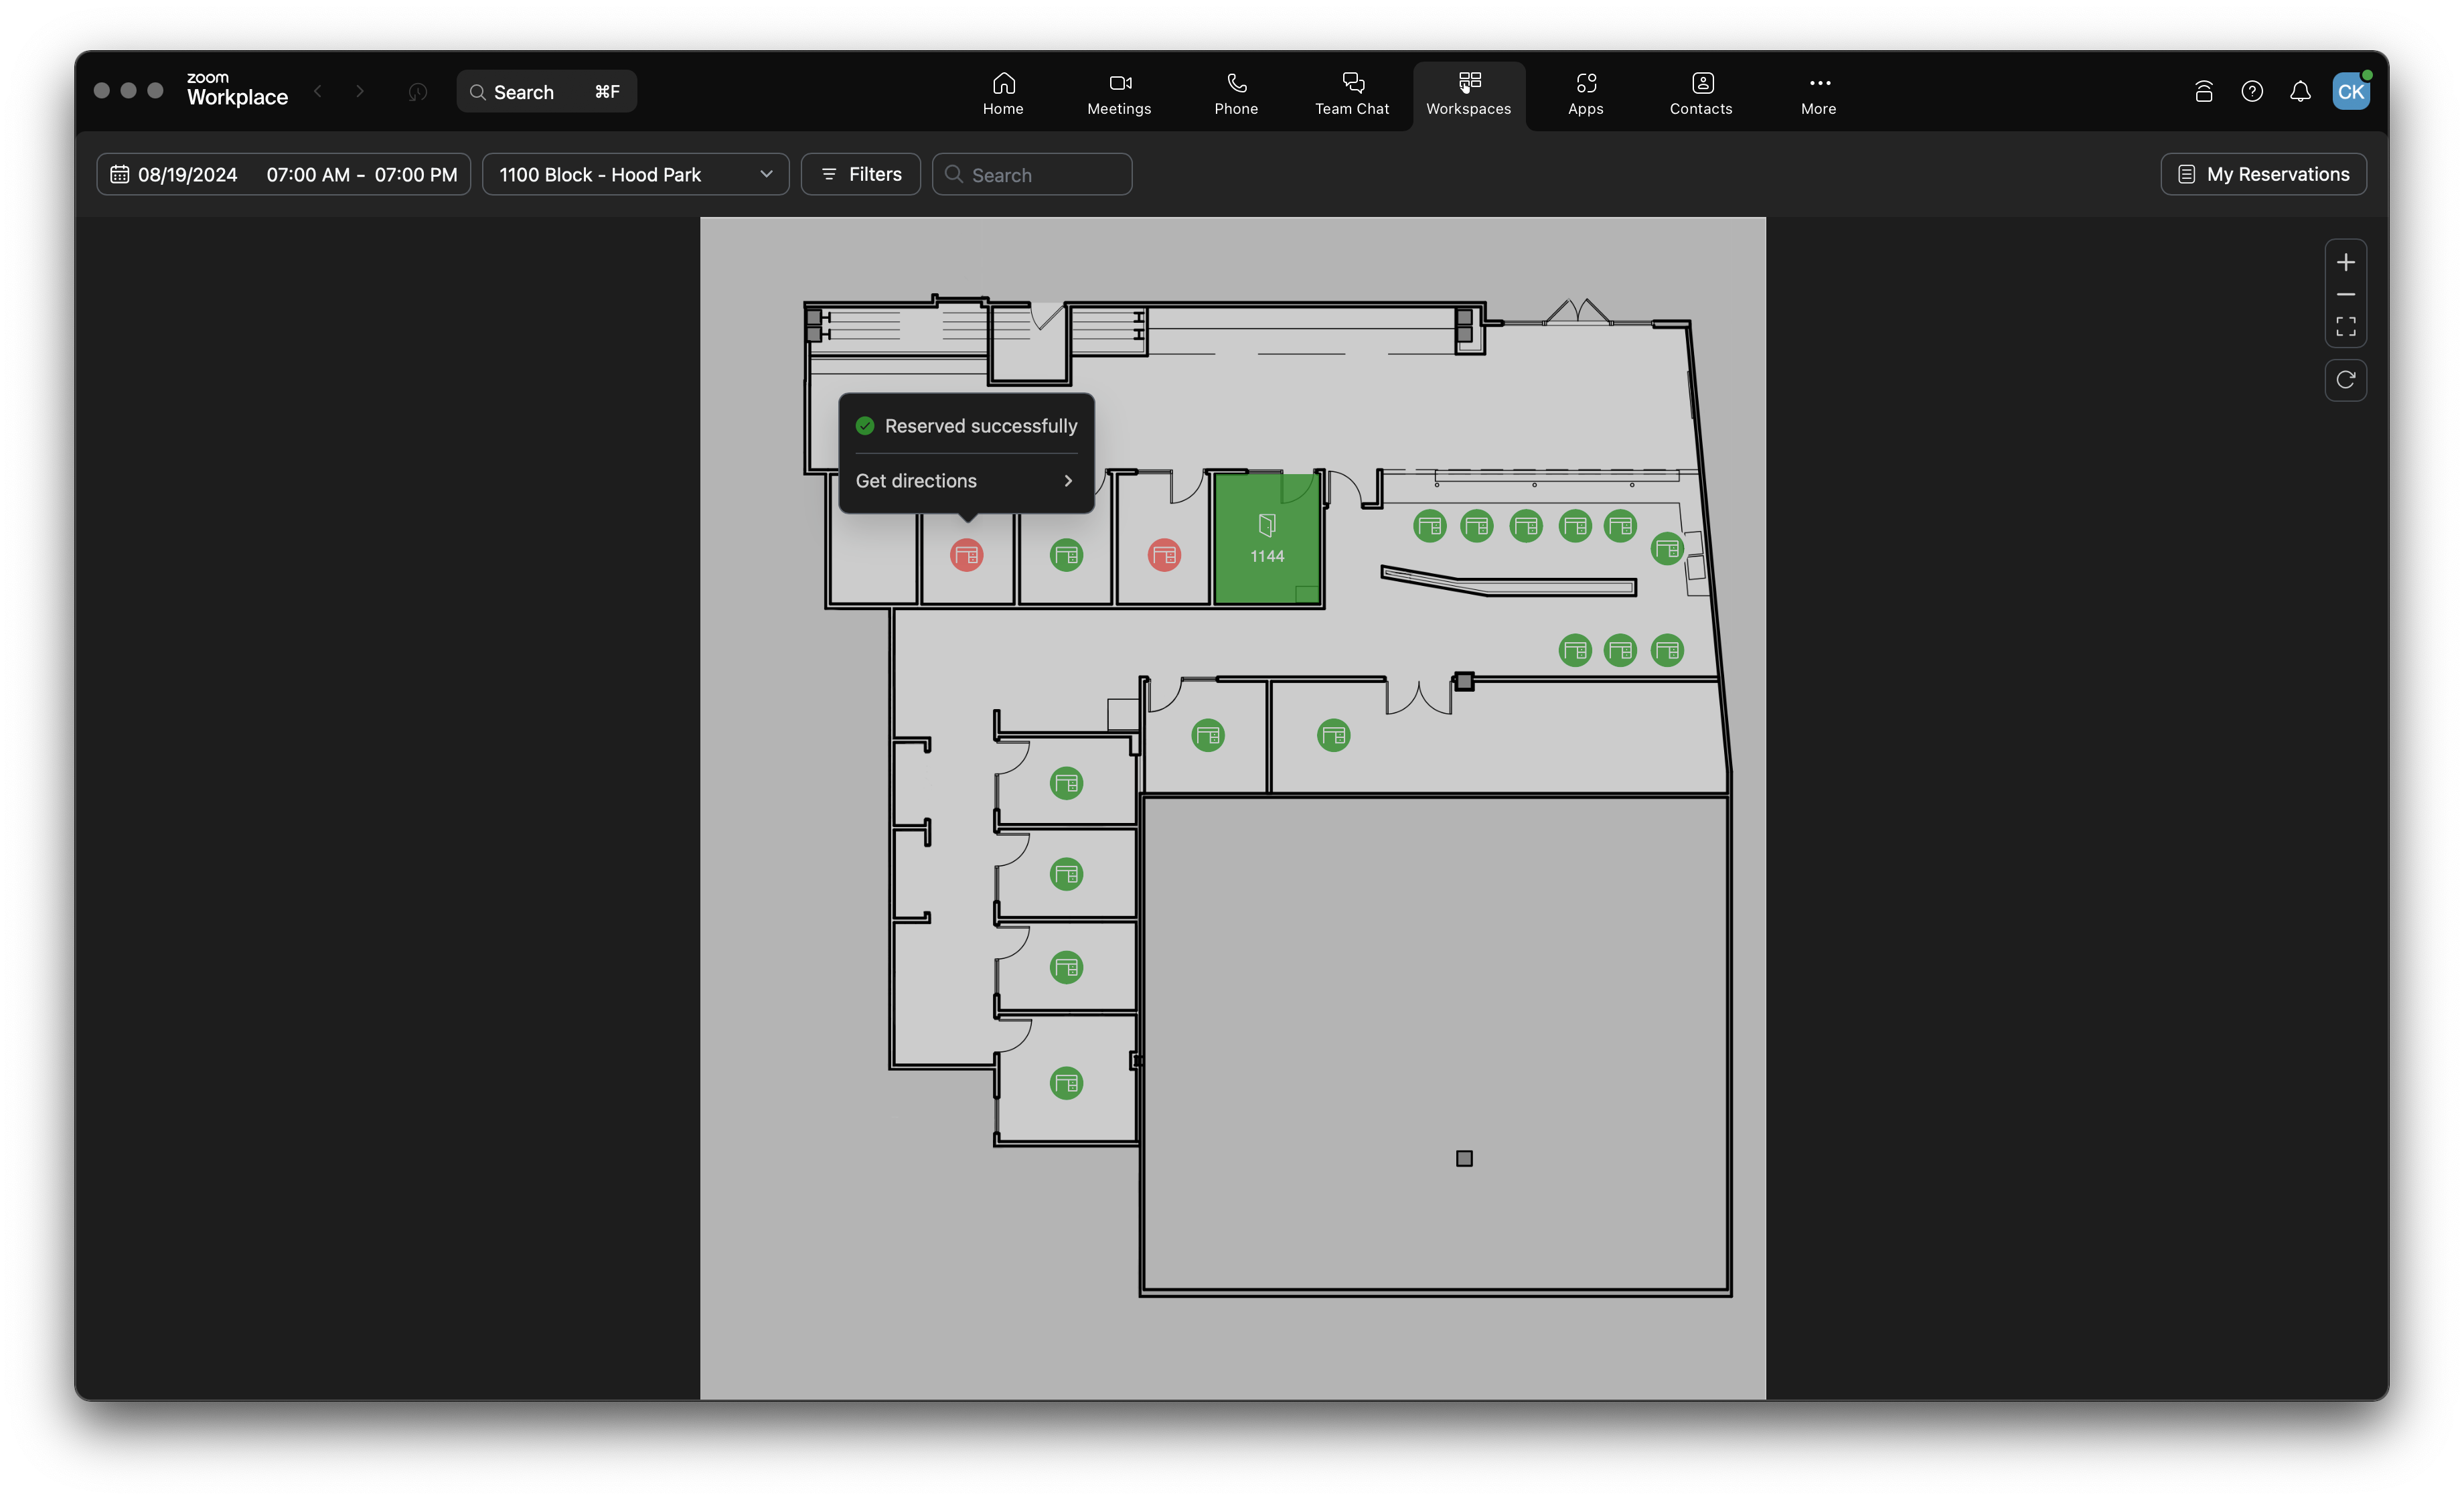
At this point, you’re all set!